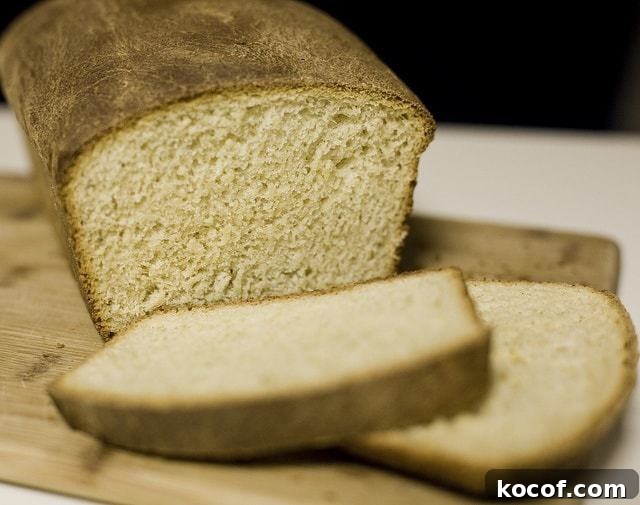
A well-made gluten-free sourdough bread is easier to prepare than many expect, and even easier to enjoy. For people who are gluten intolerant, sourdough offers a satisfying tangy flavor while being gentler on digestion. Because fermentation breaks down some of the proteins and starches in the flour, gluten-free sourdough can be easier to digest than many conventional breads. It also tends to produce a steadier blood sugar response compared with some other quick-rise breads, making it a good option for people mindful of glucose spikes.
The distinctive sourdough taste comes from a natural starter—a living culture of flour and water that ferments over time. Not every gluten-free flour behaves the same during fermentation. Different flours vary in flavor, fiber, protein and starch content, and those differences affect texture, rise and crumb structure. For reliable results, use a gluten-free flour mix that balances protein and starches well; this helps produce a loaf that is airy yet stable rather than crumbly. Beginners may prefer to buy a high-quality premixed gluten-free bread flour, which removes the guesswork of blending individual flours and makes the process more forgiving.
The Sourdough Starter
Every sourdough loaf begins with a starter. A starter is simply flour and water that have been combined and allowed to ferment, cultivating wild yeast and beneficial bacteria. Once established, the starter provides the characteristic tang and natural leavening that define sourdough.
Creating a gluten-free starter generally takes about five to seven days. After that, regular feedings will keep it active and ready whenever you want to bake. The process is simple and predictable once you get into a routine.
To build the starter, whisk together ½ cup of your gluten-free flour mix with ½ cup of water in a non-metal bowl or a wide-mouthed jar. Cover loosely and place it in the refrigerator. Over the next five to seven days, feed the starter at regular intervals by discarding half (or using some in other recipes) and adding another ½ cup flour and ½ cup water, about twice per day. If you don’t see activity within three days—bubbles and slight expansion—increase the feedings to three times per day until bubbles appear.
Signs that your starter is ready include consistent bubbling and a mild tangy aroma. A good test is that the starter should form a soft dome and become noticeably airy within roughly three hours after a feeding. At that point you can use it to make bread. Maintain the starter with regular feedings and refrigeration when not in use; a well-kept starter can last indefinitely.
The preparation takes some time up front, but the payoff is fresh, naturally leavened bread with rich flavor and improved digestibility. Once you have an active starter, baking becomes a rewarding routine rather than a chore.
Making the Bread
With a mature starter, you can bake your first loaf of gluten-free sourdough. Gluten-free dough behaves differently from wheat dough—it’s often wetter and less elastic—so early attempts may not match your expectations. Persisting with the process and adjusting small details will quickly improve results. Keep the starter active between bakes and make small tweaks to hydration or rising time as needed.
Ingredients
2 cups gluten-free flour mix
¼ teaspoon cream of tartar
¼ cup sugar
1 teaspoon salt
2 teaspoons active dry yeast
2 cups sourdough starter
3 tablespoons butter, melted (or any oil of your choice)
1 ½ cups milk, warmed to about 100°F
Directions:
Grease a 9 x 5-inch loaf pan and set it aside. In a large mixing bowl, combine the gluten-free flour mix, cream of tartar, sugar, salt and yeast. Add the active sourdough starter and the melted butter (or oil), stirring until mostly combined.
Gradually add the warm milk while stirring, until the batter reaches a consistency thicker than cake batter but thinner than cookie dough. The right texture helps the loaf rise evenly and bake through without drying out.
Pour the batter into the prepared pan and place it in a warm, draft-free spot. Allow it to rise for about eight hours, or until the batter has expanded by at least one-third. Rising time can vary with room temperature and starter activity; longer, slower rises often develop better flavor.
Preheat your oven to 350°F and bake the loaf for approximately 40 minutes. The top should turn golden brown and the center should feel set without any jiggle. Remove the pan and cool on a wire rack for about 15 minutes, then turn the loaf out to finish cooling completely. Slicing too soon can lead to a gummy texture, so patience yields the best crumb.
Serve your gluten-free sourdough fresh with butter, jam or your favorite sandwich fillings. With a bit of practice and an active starter, you’ll be rewarded with flavorful, digestible loaves that highlight the unique qualities of gluten-free sourdough.