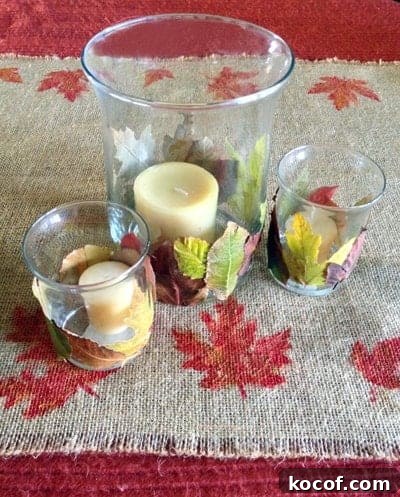
My favorite part of living in the Midwest is the changing seasons, and my favorite thing about autumn is when the leaves turn warm shades of red, orange, and yellow. While browsing autumn craft ideas on Pinterest, I found several projects featuring leaves. Most of us have so many leaves in our yard that bringing them inside feels counterintuitive, but I discovered two simple, charming projects that might make you set the rake aside. If you don’t have real fallen leaves, good-quality faux leaves work just as well.
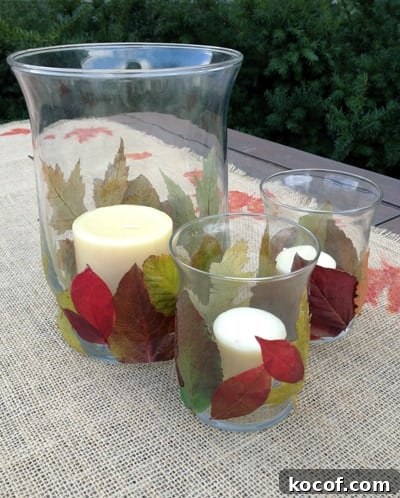
The first project is inspired by the Flame Foliage Candleholders from Martha Stewart. This idea is flexible and easy to personalize: use different sizes of glass holders and choose any leaf shapes or colors you like.
For This Craft You Will Need:
- Glass candle holders
- Leaves, real or artificial
- Spray adhesive
I used real leaves for these candleholders, so uniform shapes and colors weren’t possible, but the mix created a pleasing, natural look. The adhesive holds well, and with a little scrubbing the glass can be cleaned and reused later. Keep in mind the dried leaves let light shine through beautifully, so these look best when the candles are lit at night.
How to Assemble:
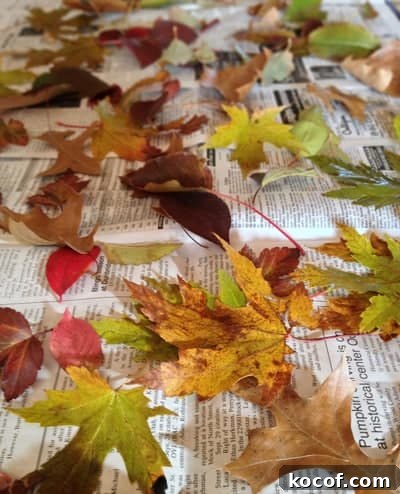
- Gather a variety of leaves. If using real leaves, spread them on newspaper to dry for about an hour.
- Spray the back of each leaf with adhesive and wait about 30 seconds for the tack to set.
- Press the leaf onto the glass holder and hold for a few seconds to secure it.
- Continue around the holder until you have covered it to your liking.
Note: Spray adhesive is flammable. Allow the adhesive to dry thoroughly for several hours before placing lit candles near the leaves.
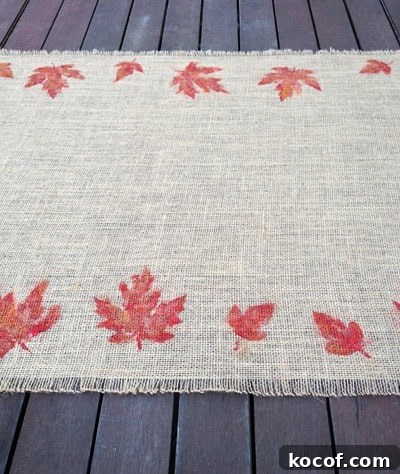
The second project comes from a DIY printed leaf motif idea and pairs nicely with the candleholders for a coordinated autumn table. I used leaves as stamps to print motifs on a no-sew burlap table runner and matching placemats.
For This Craft You Will Need:
- 2–3 yards of light-brown burlap (amount depends on desired runner length and number of placemats)
- Acrylic craft paints in autumn shades—dark red, orange, yellow—and a gold glitter paint for highlights
- Scissors
- Ruler or an existing placemat to use as a size guide
- Paint sponges and a small paintbrush
- Leaves, real or faux
How to Assemble:
- Cut the burlap to the size and number of placemats and the runner length you want.
- Pull a few strands from the edges of the burlap to create a frayed, rustic border and to even the edges.
- Use sponges to apply paint to the leaf’s top surface, flip the leaf, and press it onto the burlap to stamp the motif.
- Lift the leaf gently. The stamped impression may be incomplete; use a small brush to add more paint, define veins, or highlight details. When the paint is dry, brush on gold glitter paint for a subtle shimmer that complements the burlap’s texture.
A Few More Ideas to Finish the Table:
- Layer the runner over a red, orange, or white tablecloth for contrast.
- Add a bouquet of autumn-colored flowers as a centerpiece.
- Roll silverware in a white cloth or paper napkin and tie with a strip of burlap and a red or orange ribbon.
- Scatter extra leaves or pine cones along the runner for texture and warmth.
Whether you use these ideas for a formal Thanksgiving table or a casual family dinner, the finished look is cozy and festive—and no one will guess how little time it took. If you try either of these projects, please feel free to share your results. We love seeing how simple touches turn into seasonal décor that feels homemade and personal.
Snap a picture and share it on our Facebook page! Have a craft idea you’d like to share? We enjoy connecting on Pinterest as well.